Fuzzing Maven-Built C++ Code With Mayhem

(Reposted from Github.)
I was recently asked to help a customer with a code base that uses Maven, a build automation tool primarily associated with Java development. This was a new one for me. In this blog post, I’ll show you my process for addressing it and how you can too.
A big piece of the code analysis puzzle is integrating with build systems, and this can be hard when using non-standard tools. Within the C/C++ community we typically see systems like make, cmake, and ninja.
The project was a large code base, split into multiple different repositories. We'll simplify a bit here and assume just two repositories:
mylibrary: A maven project for building a shared library.myapp: A maven project that usesmylibraryto build a self-contained app.myharness: A maven project that usesmylibraryto build a harness that Mayhem can use.
Let's dive into how we did it, and how you can too. You can also check out our Github repo showing a full working example.
Dependency Hell and Maven to the Rescue
Every developer knows about "dependency hell." You might be experiencing dependency hell when your software has:
- Complex Dependency Trees: Software projects often rely on numerous libraries, each of which may have its own set of dependencies (transitive dependencies). This creates a complex tree of dependencies that can be difficult to resolve and manage.
- Version Conflicts: Different parts of a project or different projects on the same system might require different versions of the same dependency. Managing these version conflicts manually can be challenging and time-consuming.
- Lack of Isolation: In .
/configure && makescenarios, dependencies are typically installed system-wide. This lack of isolation can lead to conflicts between projects, where one project's dependencies interfere with another's. - Manual Resolution: Developers often have to manually resolve dependencies, determining which libraries and versions are required, and ensuring they are correctly installed. This process can be error-prone and tedious, especially for large projects with many dependencies.
What is Maven?
Maven helps avoid some of these problems. While non-standard in C/C++, it seemed to work out nicely for this customer's use case. Maven's primary use case is Java, where it's well known for its project management, dependency management, and build lifecycle capabilities. Maven uses a Project Object Model (POM) in an XML file (pom.xml) to describe the project configuration, dependencies, build order, and required plugins. Each project has a unique combination of groupId and artifactId which is used to reference the project as a dependency.
This project chose Maven to help avoid some dependency hell issues. In particular, three were important to understand for integrating new tests:
- Centralized Repository: Maven is designed around centralized binary repositories. The default
https://mvnrepository.comhosts terabytes of built open source projects. An organization can host their own internal repository as well, so Maven can work in environments that don't have public internet access. - Local Repository: Maven caches all downloaded dependencies in a local repository on your machine. By default this is in the .
m2directory in your home folder (e.g.,~/.m2/repositoryon Unix-like systems, or via theM2_HOMEenvironment variable). - Explicit Dependency Management: Dependencies are defined in the project's
pom.xmlfile, and Maven automatically downloads them from the repository. This reduces the need for manual management of libraries and their versions.
Maven Plugins for C/C++
In order to compile C/C++ code with Maven, you need to understand its plugin ecosystem. There are three ways to do this:
- Maven with NAR for C++: If you're using Maven with the NAR plugin for C++ projects, Maven handles the overall project management, dependency resolution, and invokes the NAR plugin for the C++ specific build steps like compilation and linking.
- Ant for C++ Builds: If you prefer Ant, you can use it independently for C++ projects, scripting the entire build process in the
build.xmlfile. This approach is more manual compared to Maven but offers flexibility. - Combining Maven and Ant: In some complex scenarios, you might see Maven and Ant being used together. For instance, Maven could be used for its superior dependency management and project structuring, while Ant scripts are invoked for specific tasks within the Maven build lifecycle that require custom handling not easily achieved with Maven plugins.
In this project we focused on integrating directly with Maven + NAR.
Step 1: Build the project as-is
When faced with new software, a good first step is always to make sure you know how to compile it. The Maven CLI mvn manages the overall process:
mvn compilecompiles the project, and puts the results (by default) in thetargetsdirectory.mvn installwill compile and install the project into the local Maven repository, by default in~/.m2.
Many other steps exist, but these two suffice for our purposes. For more details, check the Maven lifecycle.
Step 2: Decide how you will integrate new test harnesses
Dynamic analysis typically requires, like unit and functional tests, building a test harness. A test harness includes code for mocks, test drivers, and any setup that needs to be done before performing the actual test.
There are two ways to do this:
- Create a new Maven project with just the harnesses that import the system under test via Maven dependency management. This typically works great for libraries where the harness can use the unmodified objects being built as-is.
- Sometimes, code you want to test is contained in an executable (not a library). In this case, new harness code would need to be added directly to the Maven module that contains the system under test. If you can't add code to the central repo, a common approach is to maintain a fork with your local additions. We took this approach.
In this case, the interface the library exports suffices and we'll do (1).
Step 3: Create a myharness module.
Maven has a very opinionated default directory structure. It expects code in src/main/cpp for C++ code, includes in src/main/include, and tests in src/test/cpp. While you can override these, it's often easier just to work with defaults. In our case, we're going to add the harness code to the default src/main/cpp in a new Maven project.
We also create a new pom.xml in the myharness module and add the myharness module to the parent pom.xml.
Step 4: Write and Run Your Harness.
With this all figured out, we added a new file src/main/cpp/main.c as our harness. The harness needs to define main, and in our case it was a simple call to test the CelsiusToFahrenheit function.
You can compile this harness with `./mvnw install` (local Maven) `docker build --platform=linux/amd64 .` (dockerized Maven).
## Running with Mayhem
Performing dynamic analysis with Mayhem is super easy after the harness is
built. Just push the docker image, and specify a `Mayhemfile` saying how to
check the application:
Build the Docker image so C++ can be compiled
```bash
docker build --platform=linux/amd64 . -t dbrumley/maven-example:latest
docker push $MAYHEM_REPOSITORY/dbrumley/maven-example:latest''
image: $MAYHEM_REPOSITORY/dbrumley/maven-example:latest
duration: 30
project: maven-example
target: harness1
cmds:
  - cmd: /myharness @@
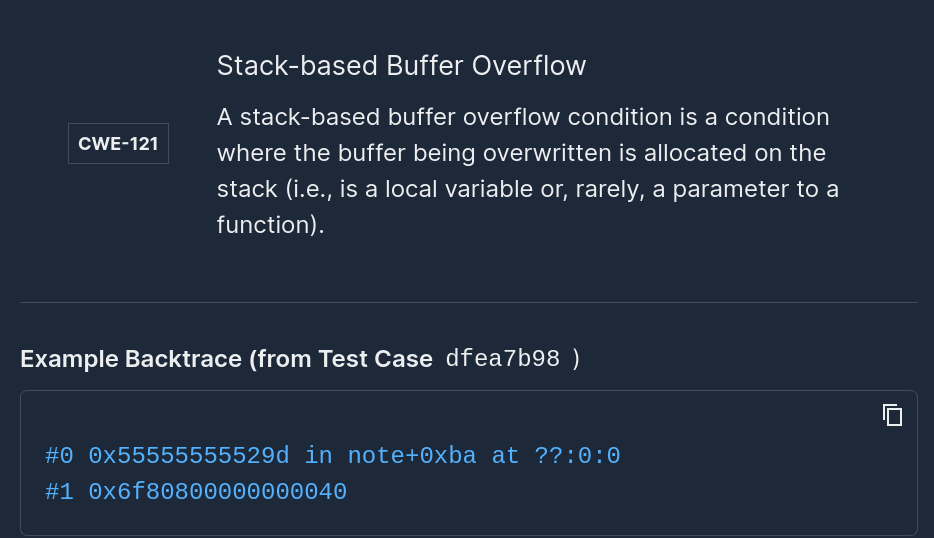
Mayhem finds a bug almost instantly. The example conversion function converts from a double to a string, but doesn't do a bounds check properly (recall we pass in a char buf[...] buf)
void conversion(celsius_t c, kelvin_t k, char *buf)
{
  sprintf(buf, "%lf celsius is %lf kelvin", c, k);
  return;
}
Mayhem finds an example input that crashes the program almost immediately:
-5486128870225019196831937724308948771408482030063034011714200761338748526848860953068154467189167438254023901036469529976518899427116188186866388367687561101259543253404734162913518640480693972842919781152860573843336048011515106063717714234487990508433623412693986670877298875553313862829328459030855680.000000 celsius is -9875031966405034554297487903756107788535267654113461221085561370409747348327949715522678040940501388857243021865645153957734018968809138736359499061837609982267177856128521493244333552865249151117255606075149032918004886420727190914691885622078382915180522142849176007579137975995964953092791226255540224.000000 kelvin
qemu: uncaught target signal 11 (Segmentation fault) - core dumped
Segmentation fault
Bonus: Unit testing your harness (running tests with the nar plugin)
As anywhere in software development, we like unit tests. They can help us verify the harness is working how it should without having to run it manually.
The tricky part was figuring out how to modify pom.xml, as Maven + NAR has a far smaller community to learn from. We finally found a great writeup and example from Jef Douglas on the NAR mailing list. He even put together a Github repo demonstrating the idea.
The key part for us was to understand that the test name in the pom.xml file are related to how you name your tests. If you have the test named test1, by default this will refer to src/test/cpp/test1.cpp.
Jef gives a wonderful example. Suppose you have the configuration:
<configuration>
<tests>
        <test>
            <name>test1</name>
            <link>shared</link>
            <run>true</run>
        </test>
        <test>
            <name>test2</name>
            <link>shared</link>
            <run>true</run>
            <args>
                <arg>param1</arg>
                <arg>param2</arg>
            </args>
        </test>
</tests>
</configuration>
The configuration above will build 2 executables, test1 and test2, each executable will be built with all the test source files whose names don't correspond to the names of other tests.
You can add other files as well, as long as they don't conflict with the test names. If you have 4 files in src/test/cpp/{main.c, util.c, test1.c, test2.c} the executable test1 will be built from main.c, util.c, and test1.c, and the executable test2 will be built from main.c, util.c, and test2.c.
In our case we're just writing one harness. The key is to make sure the source file name matches the name given here. We'll use harness1, and create harness1.c:
<tests>
            <test>
              <name>harness1</name> <!-- Set your test executable name here -->
              <link>static</link>
              <run>true</run>
              <args>
                <arg>${project.basedir}/src/test/resources/42.test</arg>
              </args>
            </test>
          </tests>
## Conclusion
Figuring out Maven was a fun journey.  We've created a small example
illustrating everything at [](https://github.com/dbrumley/maven-example)
including:
1. How to compile multiple Maven projects
2. How to [specify a dependency between the two Maven projects](https://github.com/dbrumley/maven-example/blob/7c333d4a3230fd35ba5ce4b715cd86728b464026/myapp/pom.xml#L14), in this case
   `myapp` using `mylibrary` and `myharness` using `mylibrary`.
3. Writing a harness and including it in the [build file](https://github.com/dbrumley/maven-example/pom.xml)..
4. Testing with Mayhem, which only requires writing a simple configuration
   file. The result is immediate bug-finding Mayhem making!
Recent Blogs
Crafting POCs for Fun and Profit using Mayhem
.jpg)

Add Mayhem to Your DevSecOps for Free.
Get a full-featured 30 day free trial.